Thursday 17 November 2016

Tom Yum Soup

Hello again!

Now first things first, don't feel intimidated at the look of the blog title. It's really an easy soup with the help of store-bought Tom Yam paste. So yeah, the perfect soup for lazy days.

Ingredients:

1 thumb size ginger, sliced
1 onion, cut into thin wedges
3 stalk lemongrass, smashed
2 tomatoes
2 tablespoons Tom Yam paste
Some prawns (or your choice of any other seafood), deveined
Some broccoli
Some baby corn
Some fresh lime juice (optional)


My personal favourite brand of Tom Yum paste

Method:

Heat some oil and fry ginger, onion, lemongrass, and Tom Yum paste until fragrant. Add boiling water, tomatoes and baby corn. Boil at medium heat for 10 minutes. Add prawns and boil for 2-3 minutes. Add broccoli last and boil for 2-3 minutes so that the nice green colour of the veggie is maintained. Add salt to taste and djust sourness of the soup by adding lime juice. 

Ta-daah, a hot, spicy soup ready in 20 minutes. And yes, you are right! Protein and veggies all in one pot! You can skip cooking other dishes because the soup itself is already perfect to go with hot rice! Happy cooking!


Sunday 6 November 2016

Lettuce, Pomegranate and Orange Salad with Honey-Lime Dressing

If you missed my previous post on a similar salad with the same dressing, this post is for you! It's really easy and very versatile. You can basically switch the ingredients with any fruits or veggies in your fridge. Anyway, a combo of lettuce, pomegranate, and orange is really light, refreshing, and delicious. I simply love the vibrant colours of the salad!

What's even better? Pomegranate a superfood loaded important nutrients! Here's a list of the nutrients:
- Antioxidants
- Vitamin C
- Vitamin K
- Potassium
- Folate
- Fibre

And yes, you can skip store-bought salad dressing! This homemade dressing is definitely healthier since we have complete control of what goes into it! :D

Ingredients for salad:

1 baby butterhead/ romaine lettuce, rinsed, torn into bite-size pieces
1 pomegranate, cut fruit into half, and remove seeds (arils) from the membrane
1 orange, peeled and cut into bite size

Ingredients for salad dressing:

3 tablespoon olive oil 
2 tablespoon honey
2 shallot, thinly sliced
Juice from 3 small limes

Method:

Mix all ingredients for salad dressing in a small bowl.  Combine lettuce, pomegranate and orange in a salad bowl. Toss with salad dressing. Enjoy!


Tuesday 25 October 2016

DIY Off-Shoulder Dress

OK, time to show-off your shoulders! This dress is perfect for our year-long hot and humid equatorial weather. I think it's a rather simple sewing project that a beginner can pull through.

You'll need:
2 m fabric
0.5 m lining fabric
1.5 m thin elastics

I don't have step-by-step photos this time around so I'll show a sketch of the steps. Here goes~

1. Cut fabrics based on the measurement below. I cut mine in vertical stripes because, umm, well, they say vertical stripes make us look thinner? Lol.


2. Sew the body fabrics right sides together, leaving a gap as the armhole. Iron the seams and sew around the armholes. Repeat for the other armhole. Mark the centre of the front and the back fabric.


3. Sew the two ends of the long fabric right sides together to form a loop. Iron the seam open and hem the bottom of the loop.


4. Iron down the top of the loop to form a casing. Mark the centre of the loop. Match the marks of the loop to that of the bodice and pin them together. Sew all around the loop but leave a small gap to slide in the elastic. Measure the elastic across your shoulder and chest so that it fits nicely. Safety pin one end of the elastic and slide it through the casing. Overlap the ends of the elastic and sew it together. Tug it into the casing and close the gap.


5. Sew the sides of the skirt right sides together. Repeat for lining fabric. Put the loops right sides together and sew all around the edge of the loop. Leave a small gap to insert elastic. Lengthen the machine stitch to the longest setting and sew around the top of the loop. Now gather the fabric by pulling the bobbin thread.


6. Adjust the size of the loop for the skirt so that it matches the bodice. Flip the bodice inside out with the top of the bodice facing down. Now put it into the loop of the skirt and sew them together. A casing is created (between skirt and lining) as you sew around the loop. Make sure the seam allowance is large enough for you to insert an elastic. Measure elastic around your waist so that it's a snug-fit. Safety pin one end of the elastic and slide it through the casing at the opening (from Step 5). Stitch the ends of the elastic together and close the gap. Flip the dress inside out and it's all done!


Ta-daah! This is me flaunting my dress! Hehe. More photos here


Alternatively, if dresses aren't really your cup of tea, you can totally stop at Step 4, hem the bottom of the bodice and voile! You've got yourself an off-shoulder top! Or, you can cut it shorter to make it into a crop top. Or, you can also add an elastic at the bottom of the top to add a little more details. So yeah, choose which ever one works for you! Hehe.

P/S: My height and weight are 160 cm and 52 kg respectively. I hope this little info here will be useful for you to adjust the size of your dress accordingly. Anyway, this dress here is really kinda like a free-size dress because of the elastic shoulder and waist! :D 


SaveSave

Friday 23 September 2016

DIY Bunny Drawstring Pouch

My 18mo tiny human has recently developed an interest to carry bags, and of course, to take everything out from the bag too. She would get herself so busy by dragging bags as big as her, or even doubles her size here and there. Yes, you are right! The consequence of this: she often trips herself over the bags. And kids being kids, she would scream her lungs out if I were to take it away. Since I've plenty of scrap fabrics from my previous projects, I decided to make her a small drawstring pouch so that she can play around with it. This seems like a long post but it's really not that difficult to make. Hehe.

Materials:


White outer fabric (I used cotton-linen)
Inner fabric (I used Japanese cotton)
Pink fabric
Fusible web (optional)
Pink embroidery thread
Washable fabric marker/ chalk
String/ ribbon

Method:

1. Cut fabric based on the measurement below. I draw and cut my ear template on a piece of manila card before tracing on the fabric and cutting it. Cut fusible web to the exact size of the pink ear fabric.


2. Sandwich fusible web between the white and pink fabric. Place iron on top and apply heat until the fabrics bind together. Sew around the pink fabric using zig-zag or blanket stitch. It's fine too if you don't have fusible web, just pin fabrics together or baste by hand stitching.


3. Place the ear fabric right sides together and sew, leaving the bottom of the ear open. Clip curves to remove fabric bulk. Flip the ears inside out and the bunny ears are all done.


4. Draw two small triangles on the bottom of all the outer and inner fabrics.


5. Fold the triangle in and sew it down on the wrong side of the fabric.


6. You'll end up with something like this on the right side of the fabric. Mark 3 dots at the centre of the front piece as a guide to sew the bunny's nose.


7. Hand sew the bunny's nose with a simple whip stitch.


8. Draw the mouth and sew on the marking by using back stitching. Do the same to get the eyes.


9. Sew the outer fabric right sides together. Repeat for inner fabric, but leave a small opening to turn the pouch inside out later (if you look close enough, there's no opening in this picture because I forgot to, so I ended up ripping seams to get a small opening >.<). Overcast raw edges. Put the outer pouch into the inner pouch and match the seams on the sides.


10. Prepare casing (from the 5 x 12 cm rectangles) as shown in picture. 


10. Yay, it's finally time to put all pieces together. Sandwich prepared casing fabric between outer fabric and inner fabric (the casing fabric should be slightly shorter, so just place it in the middle). Repeat for the back of the pouch with another folded rectangle. Now sandwich the bunny ears between the outer fabric and casing fabric (make sure the bunny ears are put in the right direction so that it is facing forward). 


11. Pin everything together and sew along edges followed by overcasting stitch to finish-off edges.


12. Flip the bag inside out through the small opening at the side.


13. Close the opening using ladder stitch. Push the lining fabric back into the pouch.


14. Attach safety pin to one of the end of the string. Thread it through the casing on one side then back around the other side. Tie the ends in a knot. Repeat with another string on the opposite side of the pouch.

 
15. Using a ladder stitch (i.e. an invisible stitch), sew the bunny ear to the casing to give the ears some support. Be careful not to stitch through the ear. You will want to just stitch the surface layer of the ear to the casing.


Ta-daah! this is the final look of the bunny drawstring pouch.


This pouch is really small so that it's easier to be carried by my tiny human. It'll fit a few packs of tissue paper and a mini box of raisin (to distract Baby V when she is throwing tantrums). Do adjust the size of the pouch accordingly if you are making it for older kids, or even yourself. If you are confused with any of the above steps, please drop me a message so that I can help you figure out. Happy sewing! :D


SaveSaveSaveSaveSaveSaveSaveSaveSaveSave

Thursday 22 September 2016

Mom and Baby Matching Outfits

I don't have a tutorial to share today so this is basically just a show-off of what I've made recently. Haha. This is the fourth baby dress I've made for my lil' missy. It's not that difficult to put together but it's definitely the most complicated one I've ever made (as compared to easy pillowcase dresses without buttons or zipper :P). And yes, I made that drawstring bunny pouch for her too! Please tell me it does look like a bunny because the first time I gave it to her, all she said was "Cat cat, cat cat!" I don't know whether I should cry or laugh at her statement. >.<

Cheeky Baby V

Baby V: "Nope, I'm not pooping!" LOL

I've always wanted to make myself a dress but is intimidated by the complexity of dress patterns, bodice pieces, neckline cutting, waist cutting, applying zippers, and most importantly, how on earth do I make sure that the dress fits me upon completion? I am after all, just a sewing hobbyist. 3.E With all these thoughts, I figure it's best to make a dress with an elastic waist. This is probably the easiest way to eliminate complicated cuttings and at the same time reduce the chances of getting something that doesn't fit in the end. And why off-shoulder? Because it's the in-thing now, I think. :P And of course, it's a lot easier to make than having to sew neat neckline and armholes. Haha.

So here goes~ How does it look? Pretty decent, right? LOL, shiok sendiri mode ON. Haha.


Nope, my lil' missy cannot sit still for more than 2 seconds.

And, this was her falling backwards. Almost. Haha.

Looks easy enough to make, huh? As much as I don't want to admit, I've made so many alterations along the way to make it fit better and I've lost count of how many times I needed to use the seam ripper. If you sew quite a bit too, I bet you'll agree that ripping off seams is the most annoying thing to do and it often comes in a package together with cursing and swearing. LOL. I whined so much that M finally gave this "brilliant" suggestion: Why don't' you just use this as a rug (his exact words were 拿来做擦脚布啦) and make another one? I was like what? You really want to mess with me? My blood was already boiling with all the seam ripping and you have to be so mean now? Geez. Sometimes I really wonder where all his courage and "brilliant" ideas came from. :P 

Well, me being me, there's no way I'm going to let my pretty fabric go to waste so I persevered anyway, until I'm pretty satisfied with the outcome. :P I'll come up with a step-by-step together with the RIGHT measurements soon but you'll need to use it at your discretion because I sew for fun and professional dressmakers would probably sew it in an entirely different manner. Stay tuned for the baby dress and drawstring bunny pouch step-by-steps too!


P/S: Photo credited to M. Yeah, he is mean sometimes but it's great to have a patient hubby who loves to take photos (so that I can take like a gazillion shots until I get the feel I wanted. Muahahaha.)


Friday 9 September 2016

Gula Melaka Huat Kuih

Hi guys! I've got an easy Huat Kuih recipe to share today. Why Gula Melaka? Because it gives a nice aroma and a nice brown colour to the Huat Kuih. And of course, it's partly because I have leftover palm sugar syrup from making grass jelly drink. Hehe. There are various versions of Huat Kuih using different leavening agents but I'm using instant yeast and baking powder for this recipe.


Before I start going into details, this is how I prepare the palm sugar syrup:

1. Melt palm sugar in boiling water at 1:1 ratio
2. Stir constantly to prevent burning
3. Stop boiling once sugar is melted
4. Let cool

Pretty easy, right? Now that it's done, you are all set to make the Huat Kuih!

Ingredients (A):

5 tablespoon palm sugar syrup
3 tablespoon flour
1 sachet instant yeast (11g)

Ingredient (B):

300 g flour
100 ml coconut milk 
100 ml palm sugar syrup
1 egg
1 teaspoon baking powder

Method:

  1. Mix ingredients (A) together and let it proof for 10 mins. 
  2. Mix ingredients (B) together.
  3. Mix both batter from (A) and (B) until well combined. The batter should be gooey instead of runny.
  4. Scoop batter into moulds until 3/4 full.
  5. Using a scissor, cut a "+" on top of the batter (poke scissor deep till the middle of the batter). This step assists the Huat Kuih to "bloom" better during steaming.
  6. Bring water to boil in the steamer. Put the batter-filled moulds into the steamer and steam over high heat for 20 minutes.
Ta-daah,  the cakes are now ready to be served! 

Aren't these Huat Kuih lovely?

This recipe yields 9 small cakes. If you have leftovers, just let cool and store in the fridge in an air tight container. Steam it the next time you want to have it and it will be all nice and fluffy again! Oh, before I forget, these cake taste mildly sweet, if you like them sweeter, just boil your palm sugar syrup a little longer to get a thicker and sweeter syrup. Enjoy!


SaveSave

Friday 2 September 2016

DIY White Radish/ Carrot Plush

I'm back with another fun project here! If you have been following my Instagram or Facebook, you'll know that this project was initially meant to be a pincushion. However, my lil Baby V decided that the carrot belongs to her the moment she saw it. Hmmm, love at first sight, huh? LOL. Since I've got plenty of leftover white fleece from my quilting projects, I decided to make a white radish and share how it's done, in case you want to make one for your tiny human (or for yourself maybe? Haha) :P I promise it's super easy and you'll probably get it all done in less than 30 minutes.


Materials:


White fleece (Orange fleece if you prefer to make a carrot)
Green fleece 
Light brown thread (White threads if you are making a carrot)
2 black shank buttons
Black felt
Red felt
Poly fillings (I use scrap fleece fabrics but poly fillings will definitely be more snuggly)


Method:


1. Cut a triangle and a rectangle. The rough measurement of my rectangle and triangle is as shown in photo but you can alter it to your preference (I think it's super fun to have a carrot bolster thou :P)


2. Using light brown threads, randomly sew straight lines on the triangle.

3. Set the machine on the longest stitch and stitch a line along one side of the rectangle (the longer side). Pull either the top thread or the bottom thread and slide fabric together to create ruffles. Adjust the ruffles so that the resulting length of the fabric matches the length of the triangle. You will end up with something like this.


4. Pin green fabric and white fabric right sides together and stitch them together.


5. Put right sides together and sew a line down from top to bottom to create a casing. Remember to backstitch at the start and at the end of the line.


6. Flip it inside out and carefully push the bottom out by using a pen or a chopstick. Add poly fillings into the casing from the opening at the top of the white radish.


7. Close the opening by hand stitching. Gather and tighten fabric as you sew. Knot the thread when you reach the end of the seam.


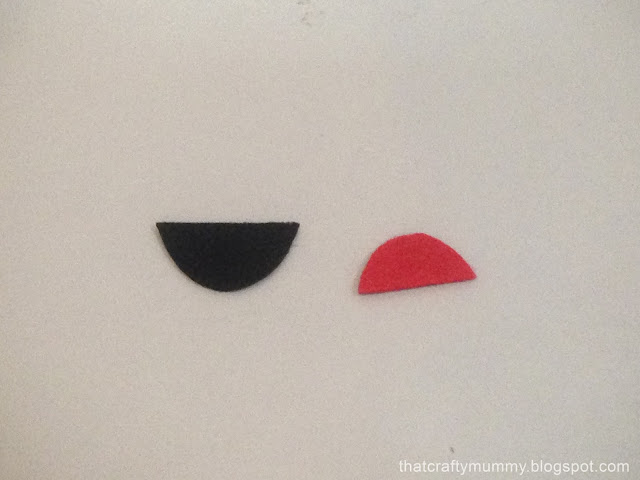
8. Cut one piece of half circle from black felt. Cut another smaller piece of half circle form red felt.


9. Attach tongue to mouth by using a glue gun.


10. Trim away edges and the mouth is ready to be attached to the white radish.


11. Sew two black thank buttons onto the white radish as eyes.


11. Randomly cut the green fabric in straight lines. The advantage of using fleece fabric is that it doesn't fray so you can cut the green fabric into as much leaves as you want. :D


12. Ta-daah, it's all done! Time to enjoy some acupuncture! LOL.


SaveSaveSaveSave