Showing posts with label Recipes. Show all posts

Thursday, 17 November 2016

Tom Yum Soup

Hello again!

Now first things first, don't feel intimidated at the look of the blog title. It's really an easy soup with the help of store-bought Tom Yam paste. So yeah, the perfect soup for lazy days.

Ingredients:

1 thumb size ginger, sliced
1 onion, cut into thin wedges
3 stalk lemongrass, smashed
2 tomatoes
2 tablespoons Tom Yam paste
Some prawns (or your choice of any other seafood), deveined
Some broccoli
Some baby corn
Some fresh lime juice (optional)


My personal favourite brand of Tom Yum paste

Method:

Heat some oil and fry ginger, onion, lemongrass, and Tom Yum paste until fragrant. Add boiling water, tomatoes and baby corn. Boil at medium heat for 10 minutes. Add prawns and boil for 2-3 minutes. Add broccoli last and boil for 2-3 minutes so that the nice green colour of the veggie is maintained. Add salt to taste and djust sourness of the soup by adding lime juice. 

Ta-daah, a hot, spicy soup ready in 20 minutes. And yes, you are right! Protein and veggies all in one pot! You can skip cooking other dishes because the soup itself is already perfect to go with hot rice! Happy cooking!


Sunday, 6 November 2016

Lettuce, Pomegranate and Orange Salad with Honey-Lime Dressing

If you missed my previous post on a similar salad with the same dressing, this post is for you! It's really easy and very versatile. You can basically switch the ingredients with any fruits or veggies in your fridge. Anyway, a combo of lettuce, pomegranate, and orange is really light, refreshing, and delicious. I simply love the vibrant colours of the salad!

What's even better? Pomegranate a superfood loaded important nutrients! Here's a list of the nutrients:
- Antioxidants
- Vitamin C
- Vitamin K
- Potassium
- Folate
- Fibre

And yes, you can skip store-bought salad dressing! This homemade dressing is definitely healthier since we have complete control of what goes into it! :D

Ingredients for salad:

1 baby butterhead/ romaine lettuce, rinsed, torn into bite-size pieces
1 pomegranate, cut fruit into half, and remove seeds (arils) from the membrane
1 orange, peeled and cut into bite size

Ingredients for salad dressing:

3 tablespoon olive oil 
2 tablespoon honey
2 shallot, thinly sliced
Juice from 3 small limes

Method:

Mix all ingredients for salad dressing in a small bowl.  Combine lettuce, pomegranate and orange in a salad bowl. Toss with salad dressing. Enjoy!


Friday, 9 September 2016

Gula Melaka Huat Kuih

Hi guys! I've got an easy Huat Kuih recipe to share today. Why Gula Melaka? Because it gives a nice aroma and a nice brown colour to the Huat Kuih. And of course, it's partly because I have leftover palm sugar syrup from making grass jelly drink. Hehe. There are various versions of Huat Kuih using different leavening agents but I'm using instant yeast and baking powder for this recipe.


Before I start going into details, this is how I prepare the palm sugar syrup:

1. Melt palm sugar in boiling water at 1:1 ratio
2. Stir constantly to prevent burning
3. Stop boiling once sugar is melted
4. Let cool

Pretty easy, right? Now that it's done, you are all set to make the Huat Kuih!

Ingredients (A):

5 tablespoon palm sugar syrup
3 tablespoon flour
1 sachet instant yeast (11g)

Ingredient (B):

300 g flour
100 ml coconut milk 
100 ml palm sugar syrup
1 egg
1 teaspoon baking powder

Method:

  1. Mix ingredients (A) together and let it proof for 10 mins. 
  2. Mix ingredients (B) together.
  3. Mix both batter from (A) and (B) until well combined. The batter should be gooey instead of runny.
  4. Scoop batter into moulds until 3/4 full.
  5. Using a scissor, cut a "+" on top of the batter (poke scissor deep till the middle of the batter). This step assists the Huat Kuih to "bloom" better during steaming.
  6. Bring water to boil in the steamer. Put the batter-filled moulds into the steamer and steam over high heat for 20 minutes.
Ta-daah,  the cakes are now ready to be served! 

Aren't these Huat Kuih lovely?

This recipe yields 9 small cakes. If you have leftovers, just let cool and store in the fridge in an air tight container. Steam it the next time you want to have it and it will be all nice and fluffy again! Oh, before I forget, these cake taste mildly sweet, if you like them sweeter, just boil your palm sugar syrup a little longer to get a thicker and sweeter syrup. Enjoy!


SaveSave

Sunday, 26 June 2016

Tomato Sauce Pasta

This is a pretty classic tomato sauce recipe made from scratch to go with your pasta. No canned tomatoes, no ketchup, but only fresh ingredients for you to enjoy what nature offers. Give it a try and you'll never turn back to using store bought pasta sauce again the next time you cook pasta. This recipe yields 3 servings.

Ingredients:

3 large tomatoes, cut into pieces
2 stick celery, cut into pieces
1/2 red bell pepper (green or yellow ones are fine too but red ones give a nice colour to the pasta sauce), cut into pieces
8-10 tablespoon ground beef
1 small yellow onion, chopped
5 clove garlic, chopped
Some broccoli, boiled
Some mixed herb 
Pasta, cooked until al dente

Method:

Blend tomatoes, celery, and bell pepper together into puree (I use a stick blender). Heat some oil in a wok. Add onion and garlic. Fry until fragrant and add ground beef. Stir fry beef until it changes colour. Add tomato, celery, and bell pepper puree. Add a dash of mixed herb. Stir pasta sauce for 5-10 minutes. Add salt and pepper to taste. Bring the sauce to a boil and pour sauce over cooked pasta. Garnish with cooked broccoli. Serve hot.

I used spaghetti for the adult's portion and spirals for my tiny human's portion since it's easier for her to self feed. :D


Friday, 24 June 2016

Cheesy Pumpkin Pasta

Have you ever tried making pasta sauce from pumpkin? Well, if you haven't, it's time to try out this vitamins and minerals packed yummy pasta sauce! This recipe yields enough sauce for 2-3 servings.

Ingredients:

5 clove garlic, minced
1 small yellow onion, minced
2 tablespoon butter
2 tablespoon cream cheese
4-5 tablespoon minced meat (pork/ chicken)
Half of a medium sized pumpkin, cut into small chunks
100-200ml milk
Some mixed herb

Method:

Cook pasta until al dente. Steam pumpkin for 15-20minutes or until soft. Mash cooked pumpkin with a fork. Melt butter over medium heat. Add garlic, onion, some mixed herb and minced meat. Fry until fragrant. Add pumpkin puree and cream cheese. Stir until cream cheese melts. Adjust sauce consistency to your liking by adding milk. Add salt and pepper to taste. Bring sauce to a boil and pour it over cooked pasta. Garnish with a dash of mix herb. Enjoy!


Friday, 17 June 2016

Prawn Curry Pasta

OK, honestly the name of it sounds weird right? Well, this is one of the funky stuff that I churn out sometimes. Haha. Take a break from the "normal" tomato-based pasta sauce and give this recipe a try! I promise it taste better than it sounds. I used kids curry powder in this recipe so that my tiny human can have a share of the pasta. This recipe yields enough curry gravy for one large plate of pasta.

Ingredients:

1 large tomato, blended into paste (I use an immersion blender)
1/2 yellow onion, chopped
4 clove garlic, minced
1 stalk curry leaf, washed and removed from stem
100ml coconut milk (replace with 1-2 tablespoon plain yogurt if you don't have this)
Curry powder, dilute in water as per instruction on packaging (mine says 15g in 200ml water, if I assume it correctly, since I bought it during my trip to Japan and the instructions are all in Japanese :P)
Handful of prawns, peeled, deveined
Some broccoli, washed, boiled, drained
1-2 king oyster mushroom, cut into bite-size slices 
Pasta

Method:

Cook pasta until al dente. Heat some oil in a wok. Stir fry onion, garlic and curry leaves until fragrant. Add prawn and stir fry until it changes colour. Add tomato paste, mushrooms and curry solution. Continue stir-frying for a while. Add coconut milk to adjust gravy consistency to your liking. Bring curry gravy to a boil and pour it over cooked pasta. Serve pasta with cooked broccoli.


You can replace prawn with other proteins like chicken, beef, or even hard-boiled egg. Similarly, broccoli and mushroom can be replaced with other veggies too. Veggies that goes well with curry gravy include long beans, baby corns, carrot, and egg plant. You can even add apple or pineapple chunks to create a mildly sweet curry gravy. Happy cooking! 


Saturday, 11 June 2016

Miso Soup

OK, this is another almost-instant soup to make that takes no more than 15 minutes. Super easy and super convenient on busy days when you have limited time to cook.

Ingredients:

Wakame seaweed, rinsed
Tofu, cut into bite-size cube
2 tablespoon miso paste, diluted in 2 tablespoon water
2 spring onion, sliced into small pieces
Some sesame oil

Method:

Add wakame to water and boil for 10 minutes. Add tofu and boil for another 2-3 minutes. Stir miso paste into soup until well combined. Switch off fire and drizzle some sesame oil on the soup. Garnish with some spring onion for extra flavour (too bad I don't have it this time, haha). Enjoy!


Saturday, 4 June 2016

Slow Cooker Beef Stew

OK, this is another upgrade of Baby V's food! A baby-friendly beef stew! While the prep time is just around 20 minutes, the cooking time is about 5-6 hours to get soft and tender meat. There's no need to cut onion and tomato into small pieces as these ingredients will "melt" into the stew after cooking. This recipe yields about 3 adult servings.

Ingredients:

500g beef, cube into bite-size pieces (I used beef knuckle, there is no need for expensive cuts as the stewing process will produce tender meat anyway)
5 slice ginger
1 onion, cut into wedges
1 carrot, cut into 1-2 inch pieces
1 tomato, cut into half (I normally just use tomato ketchup but this is a heathy baby version, so yeah)
1 stick cinammon
1 star anise
800 ml water

Method:

Heat some vegetable oil in a wok. Saute ginger and onion until frangrant. Add beef and stir fry until lightly browned. Add spices and water. Bring it to a boil and transfer the stew into a slow cooker. Add tomato (if you prefer to remove the skin, just blanch the tomato in boiling water for 2 minutes and the skin will come off easily). Cook in automatic mode for 4-5 hours. Add carrot and continue cooking for another 1 hour.

Shred few pieces of beef and cut carrots into smaller pieces with a spoon and the baby version beef stew is now ready to serve! My tiny human had her first taste of beef stew around 11 months old and she seemed OK with the taste of mild spices. Give it a try if your are thinking of introducing mild spices to your little one! For the adult version, add some soy sauce, sugar, chilli flakes, salt, and pepper to the remaining stew. Serve with white rice. Enjoy! 


Saturday, 28 May 2016

Red Amaranth (Bayam) Soup

This is another super nutritious and super quick soup to make! Rich in vitamin A, vitamin C, iron, magnesium and calcium, this leafy vegetable is definitely something that you don't want your little one to miss!

Ingredients:

Red amaranth, leaves removed from stalks and washed
Dried anchovies, cleaned and washed
A few cloves of garlic

Method:

Heat oil and fry garlic and anchovies until fragrant. Add amaranth leaves and stir fry until it wilts a little. Add boiling water. Boil for another 5 minutes over medium fire. Add salt to taste. The ruby red colour amaranth soup is now ready to serve!


Yep, that's exactly how easy the recipe is. The only thing you need to take note of is that the leaves tend to accumulate more soil than most other veggies and hence, needs a few more runs of thorough rinsing. :D


Thursday, 26 May 2016

Apple Muffins

New to baking? Muffins are probably the easiest thing to bake! No mixer needed and no need to wash a ton of equipments. And, what's best? The chances of failing is close to zero! Well, at least it is when compared to more complicated projects, like making a sponge cake, or a bread loaf. In general, the key to well-rising muffin is not to over-mix the batter. So here goes, a simple apple muffin recipe to kick-start your baking journey!

Dry Ingredients:

200g self-rising flour
50g sugar
A dash of cinnamon powder

Wet Ingredients:

2 small red apples, peeled, coarsely grated
100g butter, melt over low fire and let cool
1 egg
100ml milk

Method:

Preheat oven to 200oC. Line muffin tin with muffin liners. Mix dry ingredients together. In a separate bowl, mix wet ingredients together. Pour the wet ingredients mixture into the dry ingredients mixture. Gently mix it until just combined, say, within 10 seconds? The batter should be thick and "spoonable". Over-mixing will create tough and flat muffins. Fill muffin liners until 2/3 full. Bake at 200oC for 20-25 minutes or until a toothpick inserted in the middle of the muffin comes out clean. Easy-peasy!


This recipe yields 12 muffins. Green apples are usually used in apple muffins. However, I used red ones because they are sweeter and perhaps more appealing to tiny humans. Most importantly, sweeter apples also means reduction of added sugar to the muffins. So yeah, its really up to you whether to use red or green ones!

Happy baking!


Monday, 23 May 2016

Luffa (Petola) Egg Drop Soup

Many pork or chicken based Chinese soups usually take long hours to cook, or at least 45 minutes cooking time to get tender meats. Now what do you do when you only have 15 minutes to cook a soup to go with your little one's rice? Try this quick and easy luffa egg drop recipe! 

Ah... Before I start with the ingredients, I want to make a silly confession: I've always thought that petola is an English word until I googled about it when writing this post! So yeah, if you don't already know this, be reminded that petola is actually a Malay word and this gourd-like thingy is called luffa in English! Haha.

Ingredients:

3 clove garlic, sliced
3 slice ginger
1 luffa, peeled and cut into chunks
1/4 carrot, cut into thin strips
4-5 tablespoon minced meat (pork/ chicken)
1 egg, whisked 

Method:

Heat some oil and stir fry garlic and ginger until fragrant. Add minced meat. Add luffa and carrot. Stir fry for a minute or two until luffa pieces wilted a little. Add boiling water. Boil for 5 minutes and stir egg into the boiling soup. Season with salt and pepper if desired. Ta-daah, a wholesome quick soup with both meat and veggies in it is ready to serve!


Baby V is a huge fan of luffa! She was on a food-strike, or rather rice-strike AGAIN on this particular  day when I cook this soup. So what did her desperate mummy do? Let her self feed the veggies while trying to spoon feed her the soup! And guess what, she ate about one third of a medium-sized luffa! It's really a relief to see her eat something, ANYTHING, especially after days of only eating 2-3 tablespoon food every meal time.


Saturday, 21 May 2016

Creamy Mushroom Pasta

Is your little one a fan of pasta? How about a change from the usual tomato based pasta sauce? Try this easy creamy mushroom pasta sauce recipe! This recipe yields enough sauce for one large plate of pasta for an adult.

Ingredient:

2 tablespoon butter
5 clove garlic, minced
1 teaspoon flour
300ml fresh milk (might need some extra to adjust sauce thickness)
1 tablespoon cream cheese
5-6 fresh mushrooms (portobello, shiitake, or button mushroom), washed and sliced
Some mixed herb
Pasta, cooked until al dente

Method:

Melt butter over medium fire and sauté garlic until fragrant. Add mushroom and fry until a little browned. Add milk. Stir flour into the mixture to thicken the sauce. Add cream cheese and stir until all of it melts into the sauce. If the sauce appears to be too thick, add some more milk and adjust consistency to your liking. Season with salt and pepper if desired. Bring sauce to a boil and pour it over cooked pasta. Garnish with a dash of mix herb on top. Serve warm.


Looks yummy? I used spirals so that my tiny human will be able to self feed easily. If your little one is at the same "I-don't want-you-to-feed-me" phase, try different pasta shapes like fusilli, penne, macaroni, and shells that tiny fingers can hold easily! In fact, your little one will probably be fascinated with pasta shapes that they have not seen before. Hehe.


Wednesday, 18 May 2016

Cheesy Pumpkin Soup

Is your little one bored with rice? Or bored with noodles? No problem at all! Try serving bread with this nutrient dense, yummy soup as dipping! It might just be your little one's next favourite soup!

Ingredients:

Half of a small pumpkin, cut into small chunks
2 tablespoon butter
2 tablespoon cream cheese
5 clove garlic, minced
3-5 tablespoon minced chicken
Water 

Method:

Melt butter over medium fire. Add garlic and saute until fragrant. Add minced meat and pumpkin. Stir fry for a few minutes and add just enough water to cover the pumpkin. Do not add too much water since pumpkin releases water as it cooks. Cook for 15 minutes or until the pumpkin softens. Mash pumpkin with a fork against the bottom/ side of the pot so that the soup becomes thick. Add cream cheese and stir until all of it melts into the soup. Garnish with a small dollop of cream cheese on top. Serve warm. Yums!


Tuesday, 17 May 2016

Tomato Tofu Egg Drop Soup

This is another almost instant, easy soup to whip up. Perfect for busy days where you have limited time to cook. As easy as it many seem, it is actually one of Baby V's favourite soup as she loves tofu and tomatoes.

Ingredients:

2 tomatoes, cut into bite-size chunks
1 box soft tofu, cubed
1 egg, whisked
3-4 slices ginger
3-4 cloves garlic
Some sesame oil
Some chopped coriander/ spring onion for garnish

Method:

Heat some oil and stir fry ginger and garlic until fragrant. Add tomatoes and continue stir frying for a minute or two. Add water and bring the soup to a boil. Add tofu and continue boiling for a few minutes. Lastly, stir egg mixture into boiling soup. Add salt and pepper if desired. Drizzle with some sesame oil and garnish with coriander or spring onion. Ta-daah, the soup is ready to serve!


Friday, 13 May 2016

One Pot Chicken Rice

Pff... Don't know what to cook for dinner? Or you are having that "can-we-eat-outside-tonight" melt-down? Give this fuss-free recipe a try so that you don't have to think about WHERE to eat out. That can be tough to decide too sometimes, well, at least for me. Haha.

Ingredients:

6-8 pieces of chicken, blanched
4-5 mushrooms, soaked and cleaned
Rice, washed
1 teaspoon soy sauce
Some sesame oil
Some pepper
Half bulb garlic, washed (you can mince the garlic if you prefer a more garlicky taste, directly putting it to the rice is just me being lazy, haha :P)
A few slices of ginger
Pandan leaves, washed and tied in a knot (too bad I don't have it this time)
Water

Method:

Add water to rice according to your usual preferred ratio (the general 1:1 ratio is good although you may need a little more if your little one prefers softer rice). Add soy sauce and pepper and mix thoroughly. Add ginger, garlic and Pandan leaves. Lay chicken pieces on top of rice in a single layer. Add mushrooms. Drizzle generous amount of sesame oil. 


Close the lid and switch on the rice cooker. Do not open the lid once the rice cooker switches to the "keep warm" mode. Let the chicken rice sit in the cooker for at least another 20 minutes. This allows the remaining steam to cook both the rice and the chicken pieces thoroughly. Ta-daah, the chicken rice is ready to serve!


You can season the rice with a bit of salt before cooking for extra flavours. Anyway, since I'm serving it to my tiny human, I prefer to season with just a little bit of soy sauce. Happy cooking!


Saturday, 7 May 2016

DIY Bread Loaf: The "I-Don't-have-a-Bread-Maker" Way

The last time I made a bread loaf was like, emm... at least a year ago? LOL. Yep... Only mummies with clingy tiny humans understand the agony of having a long "I-want-to-do-this-and-that" list, but simply cannot find some me-time to do any of it. With 13 months old lil' lady who only wants to self-feed, I figured it's time to start baking again so that she can enjoy some wholesome homemade bread.

Now why should you bother making bread at home? Well, because it's free from nasty stuffs like softeners, conditioners, preservatives, improvers, and so on. Having said that, I do understand that we don't really have the luxury of making bread from scratch all the time, so I will make it whenever possible (or rather when I feel adventurous, LOL). Anyway, I do prefer to have a bread maker if I were to bake regularly. :P It's not that complicated to make bread the old-fashion way, but it does require a little patience and effort. Haha.

Alright, let's cut long stories short. What's the key to soft fluffy bread if you where to hand-knead and oven-bake? Ferment part of the bread dough in the fridge overnight! Yep, as easy as that! If this is new to you, and like me, you don't have a bread maker just yet, read on! This recipe yields 1 big loaf of bread.

Ingredients for refrigerated overnight ferment (A):

200g high protein flour
150ml water
1 teaspoon instant yeast

Ingredients for bread dough (B):

300g high protein flour
150ml water
1 teaspoon instant yeast
1 tablespoon sugar
A dash of salt
1 teaspoon oil

Method:

  1. Mix all ingredients for the refrigerated overnight ferment (A) in a small bowl. Just stir it with a spoon until well combined. No kneading required. 
  2. Cover the mixture with a cling wrap. Ensure that the cling wrap touches the entire surface so that the surface of the ferment doesn't dry up.
  3. Pop the bowl into the fridge and ferment for at least 8 hours. The yeast will do its job and you'll get a bubbly wet dough next day.
  4. Oil the surface of a bread pan and dust it with some flour.
  5. Combine the ferment with all ingredients for bread dough (B), excluding oil. Knead dough until it clears the side of the bowl. The dough should be an elastic ball that is no longer sticky.
  6. Add oil and continue kneading for a few more minutes. Pop the dough into the prepared bread pan and loosely cover it with a lightly oiled cling wrap (for easy removal of cling crap should the dough rise until it touches the cling wrap). 
  7. Leave it on the counter top proof for an hour. The bread dough should now double in size.
  8. Remove cling wrap and carefully transfer the bread tin into the oven. Bake it at 200oC for 25-30 minutes.
  9. Let cool on a rack for an hour or so. Cut into slices and enjoy!


Not the best-looking bread (looks a little burnt on top thanks to the uneven heat of my oven) but it's really fluffy and springy. Look at the air pockets! I am beyond ecstatic with the outcome. So glad that my effort actually pays off. Haha. 

Now if you prefer to make in into different shapes, do it by all means! I would love to make smaller buns but my tiny human was already screaming for me before I even manage to let the bread proof. So yeah, a big loaf of bread is all I manage to do.  >.< You can totally make steamed buns with the exact same recipe by just replacing the high protein flour with pau flour.

Here's the thing with homemade bread, it doesn't keep as good as the commercial ones. In fact, it will most likely harden on the next day of baking. I give it a quick 5-10 minutes steam before serving to my little one so that it's all soft and fluffy again. Last but not least, if you are certain that you can't finish the entire loaf in say, 2 days, it's best to keep it in the fridge in an airtight container for maximum freshness. Just lightly steam or toast it before eating and it will be all nice and tasty again. Hehe.

Happy baking!


Saturday, 30 April 2016

Apple and Snow Fungus Pork Rib Soup

Baby V basically lives off soups and rice these days, rejecting mushy foods like porridge and oats. On good days she'll take some shredded meat and veggies hidden in the rice. On bad days, she'll spit them all out. I am hoping that this is just a phase that she'll outgrow soon. T_T

If you have a fussy tiny human that loves soups, give this easy-peasy soup a try.

Ingredients:

2 red apples, peeled and cut in large chunks
300g pork rib/ lean pork, blanched (pork ribs make a slightly more flavourful soup though)
Handful of red dates, halved
Handful snow fungus, soaked and washed
2 slice ginger

Method:

Bring water to a boil and add all the prepared ingredients. Simmer for 45 minutes with low fire or until the meat is tender. Season with salt if desired. Try it, the apples give a refreshing sweet taste to the soup that counters the oiliness of pork ribs. :D


Thursday, 28 April 2016

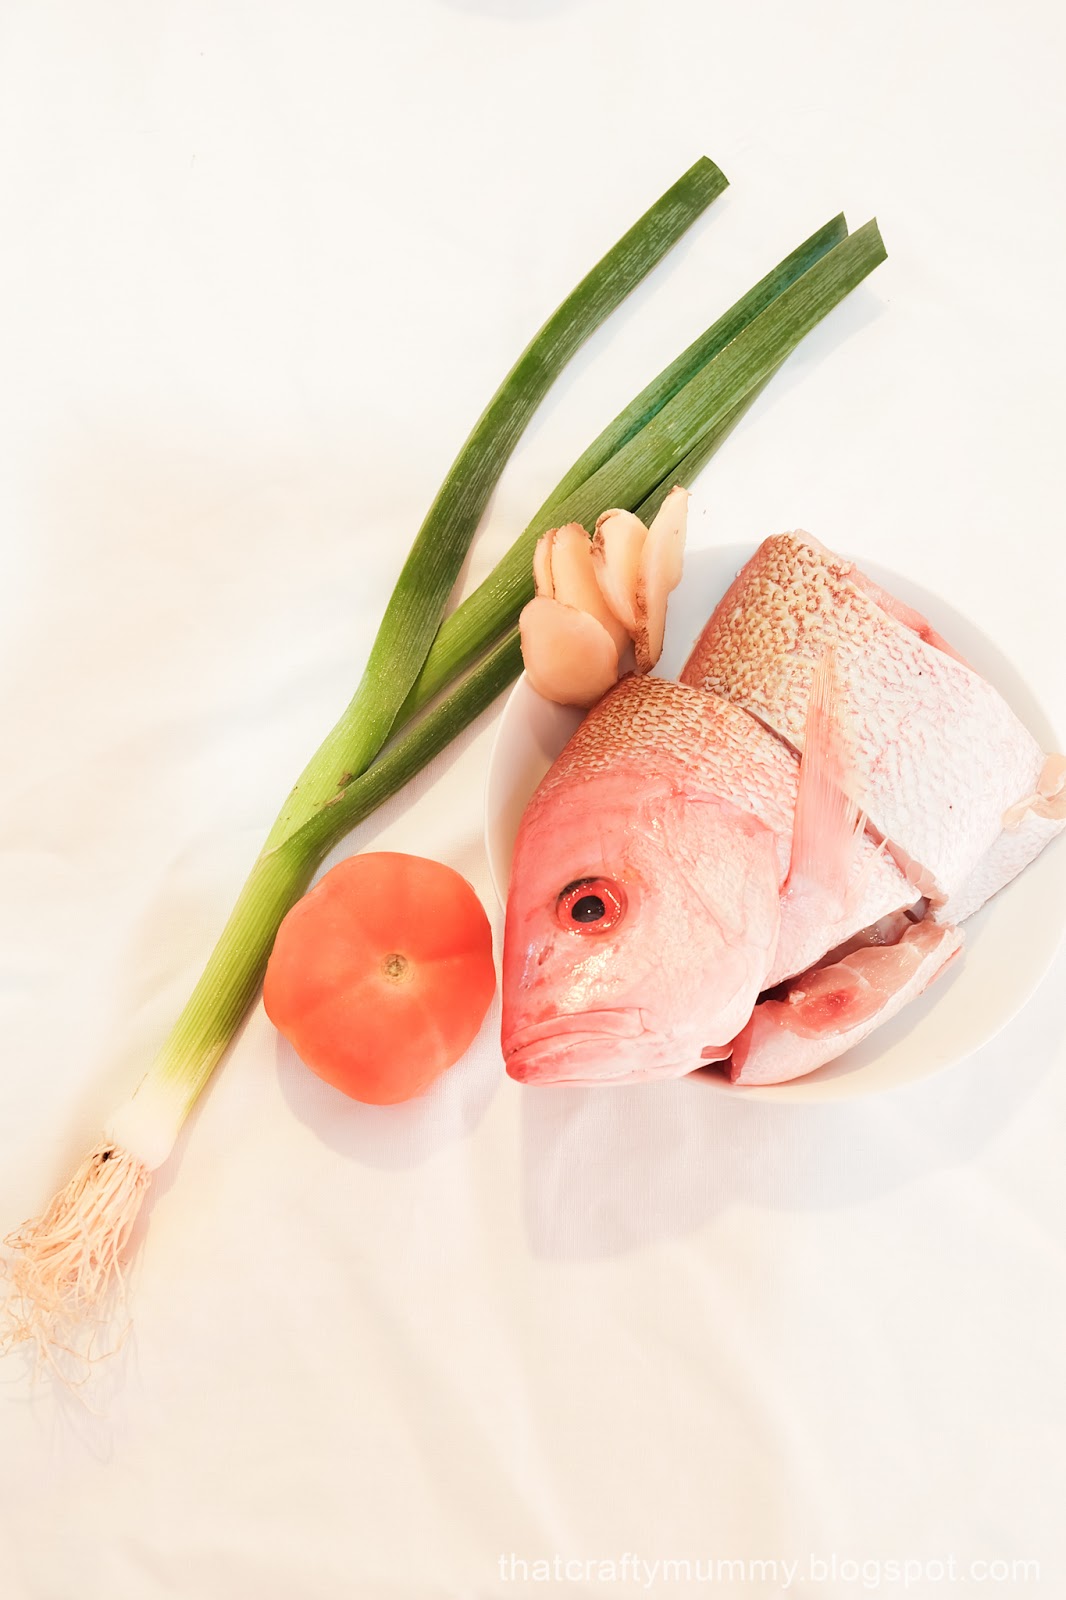
Tomato Fish Soup

This is a pretty appetising soup with a tinge of sourness. Have a try!

Ingredients:

500g fish, cleaned and cut into sections (I used red snapper, white promfet is fine too)
1 large tomato, cut into chunks
1 stalk leek, cut diagonally into thin slices, separate the white and green parts
A few slices of ginger
5-8 tablespoon white vinegar (adjust sourness to your liking)
1.5L water


Method:

Heat oil and fry fish on both sides until lightly browned. Add ginger and white parts of the leek slices and fry till fragrant. Add boiling water, tomato and white vinegar. Boil soup over medium fire for 20 minutes. Add the green parts of the leek to the soup a few minutes before serving. Season with salt and pepper (I omitted these for Baby V's portion). Voile! A nice hearty fish soup is ready to serve with hot rice! :D


Tuesday, 26 April 2016

Black Bean Soup

This is another easy soup recipe that takes minimal preparation time. Let's get started!

Ingredients:

2 handful of black beans, washed
300g pork rib/ chicken, blanched
Handful of red dates, halved
Half bulb of garlic,washed
1.5L water

Method:

Bring water to a boil and add all the prepared ingredients. Simmer for 45 minutes or until the meat is tender. Season with salt if desired. 


Here's a tip to softer black beans: soak it overnight in the fridge with some water  No need to discard water used for soaking, just add it to the soup when cooking. Again, to nursing mamas, this nutritious soup could be your next milk booster too!


Wednesday, 20 April 2016

Cheese Baked Tomato Rice

This is another simple dish easily made with everyday ingredients in the fridge. If you are thinking of making a different rice variant for your little one, try this recipe! Baby V approves of it and I sure hope that your little one would love it too. What's more? It satisfied my own cravings for cheese too. Haha. :P

Ingredients:

1 small tomato, blended into paste (I use a stick blender, or you can substitute it with tomato ketchup)
5 cloves garlic, minced
Handful of shrimps
2 eggs
1 bowl cooked rice
Some mixed herb
Some Mozzarella cheese (substitute with cheddar slices if you don't have this)

Method:

Stir fry garlic until fragrant. Add eggs, stir constantly until almost set. Add shrimps and continue frying. Add rice, mixed herb, and tomato paste. Stir fry all ingredients until well combined. Fry a little longer if you prefer the rice to be drier, otherwise the rice will turn out just soft enough for tiny humans with limited teeth. Season with salt and pepper if desired. Pour rice into an oven-safe dish. Grate generous amount of Mozzarella cheese on top. Bake at 200oC for 10 minutes or until the cheese is nicely melted over the rice. Bon appetit!