Showing posts with label Crafts. Show all posts

Monday, 6 June 2016

Quiet Book Page: Ruffly Lion

Good day!

Let's continue with the ruffly lion page for the "At the Zoo" quiet book.

Materials & Tools:

Felt - light brown, pale yellow, black, white, purple
Thread - light brown, black
Rig rags - yellow, orange
Ribbons - dark brown, light brown, orange polka dots, light brown polka dots
Needle
Hot glue gun
Fire lighter

Steps:

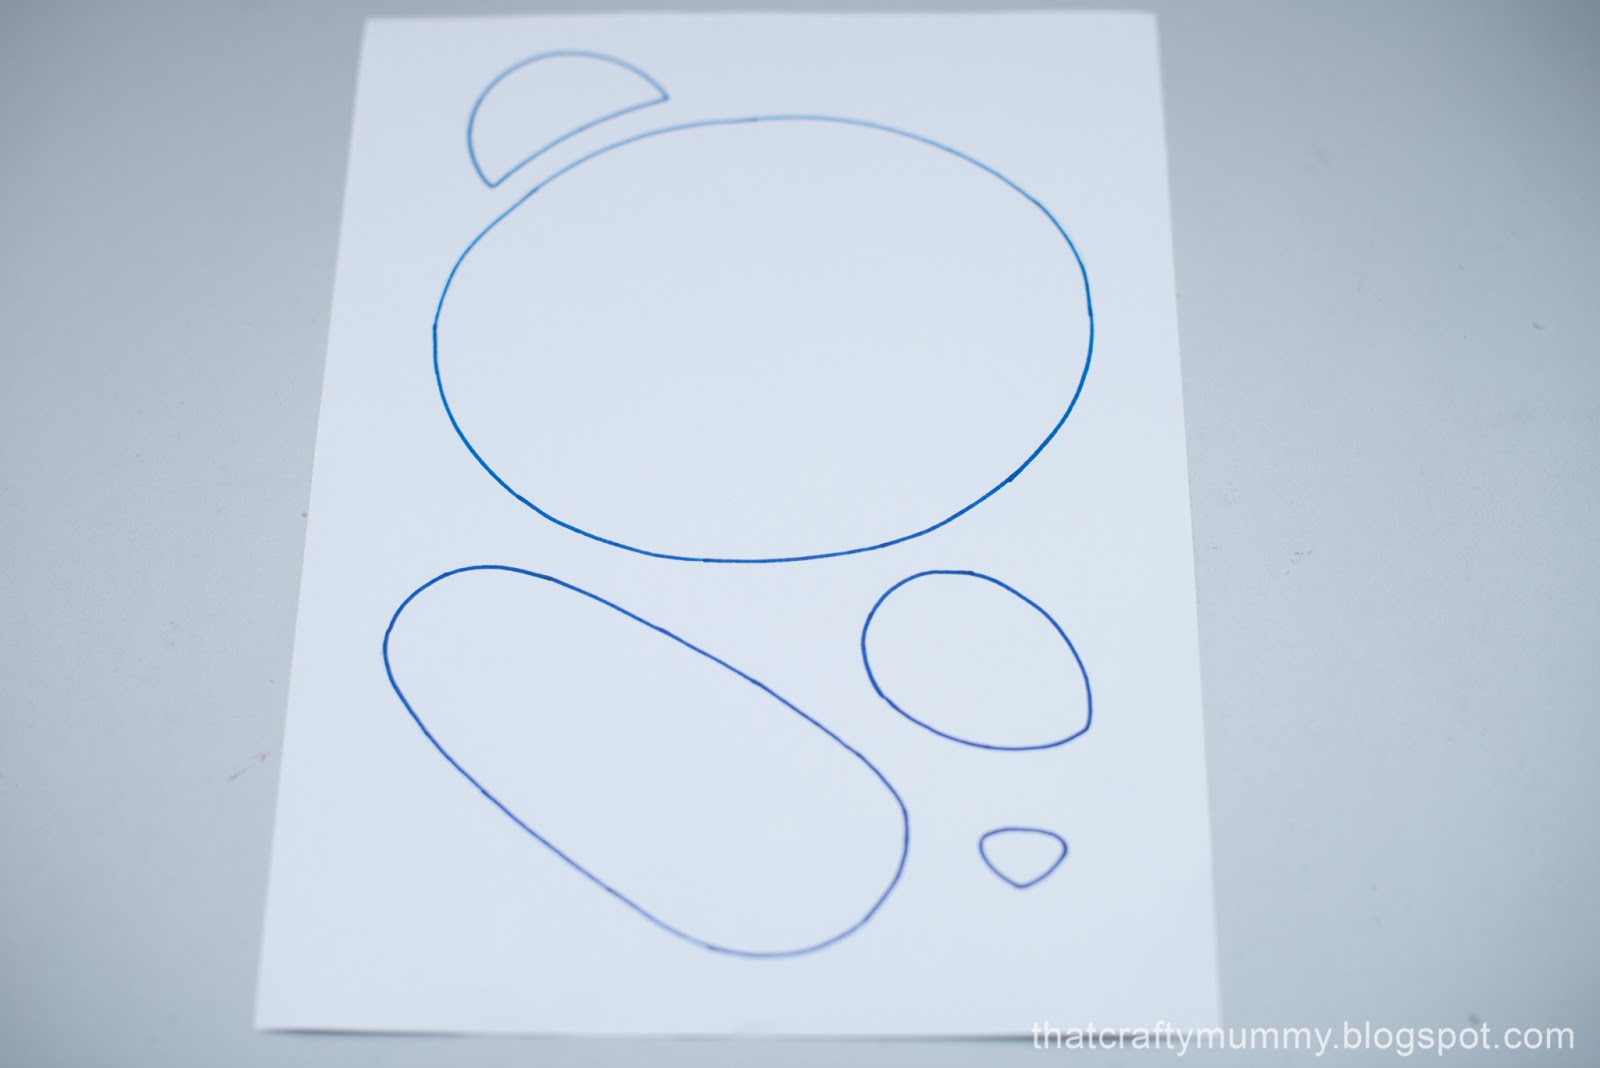
1. Cut felt pieces based on the template. 


2. Attach ears, eyes, nose and mouth to the lion face using hot glue.

3. Cut ribbons and rig-rags as the lion's mane. I cut brown ribbons into longer lengths to create loops while the rest of the ribbons and rig-rags are cut into lengths half the size of the brown ribbons. Carefully burn the ends using a fire lighter to prevent fraying.


4. Time to attach the hairs to the head! Using hot glue, carefully attach ribbons and rig-rags to the back of the head, with the ends of the ribbon measuring about an inch from the edge of the head. Now, glue the lion head onto the page.

5. Make simple straight line stitches along the edge of the head to secure the head and mane to the page. Lastly, stitch the eyebrows and whiskers using the back-stitching method. Yep, the ruffly lion page is now all done!


SaveSave

Saturday, 4 June 2016

Quiet Book Page: Peek-a-Boo Panda

Now that Baby V's "At the Zoo" quiet book is complete, I'll be spending time on the steps for you to make your own. This time around I don't have photos for every single step of the page making but I can assure you that everything you need to know about the process will be explained in detail. And of course, free printable templates will be available for download soon. So here goes, let's start with the peek-a-boo panda page!

Materials & Tools:

Felt - Black, white, pink, lime green
Thread - Black
Needle
A pair of googly eyes
A pair of snap fasteners
Hot glue gun

Method:

1. Cut felt pieces based on the template.


2. Arrange all parts accordingly as in where you want the ears, eyes, nose, and blush to be before you start glueing it permanently with hot glue. This step is important because you'll get all sorts different panda faces with different arrangements. Haha. You also want to ensure that the eyes are in the right place so that the arms are long enough to reach and cover them.

3. Glue all parts excluding the arm. Thread a needle and tie several knots at the end. Use two strands of threads instead of a single strand so that the outline of the mouth is more prominent. Sew the mouth (i.e. something shaped like the letter "w") below the nose using the back-stitching method. Sew one side of the snap fastener on the panda body.


4. Sew another side of the snap fastener on the arm of the panda. Repeat for two arms. You'll end up with arms that exposes messy stitches from sewing the snap fasteners. Layer another arm cut-out on top so that the stitches are hidden. You can either glue the pieces together or blanket stitch around the pieces. I prefer the later because it gives more durability, especially with destructive tiny humans. :P


5. Fasten the arm to the body and there you go, a shy panda with movable arms! 


Friday, 3 June 2016

"At the Zoo" Quiet Book: Video

Ta-daah! My "At the Zoo" quiet book for my tiny human! Stay tuned for the upcoming tutorials and printable templates! Enjoy!


Saturday, 14 May 2016

Felt Sandwich Play Set: Part 3 - Cheese and Bacon

How did your felt sandwich set project went? I sure hope you had fun sewing all the felties. Let's continue with cheese and bacon felties today!

Cheese

1. Draw and cut cheese slices based on the template. The larger holes are cut but using a scissor after slicing the centre f the hole with a knife whereas the smaller holes are made by using a hole punch. I prefer to sew two layers of felt together for extra durability because tiny humans can be pretty destructive (or is it just mine? LOL). Anyway, if you've read about my previous post, you might be wondering why didn't I double up layers for lettuce leaf too? Hmm... Well, because I think a thin single layer of felt would have more resemblance to a real lettuce leaf. Hehe.

2. Glue around holes and blanket stitch two cut-outs together back to back. Yes, you can do it the easy way too, just glue both pieces together! But again, blanket stitch does give extra reinforcement so that the felties can last longer. :D Anyway, this should not be a concern if your sandwich set is meant for older kids who don't go around ripping stuffs like my 13mo tiny human. Haha.


Bacon

1. Bacon felties are the easiest among all to make. Just cut strips of maroon, white and brown felts.

2. Glue them accordingly in stacks and your bacon felties are ready in no time! You can glue the white and maroon strips on both sides of the brown strip so that the bacon streaks are visible on both sides, but I prefer to just do one side so that the thinness of the bacon felties resemble real bacons. So, yeah, I made mine using only hot glue without any stitches. It's so easy to made that I have zero worries that my tiny human would destroy it. If she really did, I'll just make another one. Haha.


My tutorials on all felties for the sandwich set has finally come to an end! All templates available here. Happy crafting! 


Thursday, 12 May 2016

Felt Sandwich Play Set: Part 2 - Lettuce and Egg

Lettuce

1. Draw and cut template on a piece of light green felt. Pinch the back of the lettuce and start sewing the "stem" of the lettuce leaf.


 2. Pinch the back of the felt where you want the "veins" to be and continue sewing.


3. This is how the front of the lettuce leaf look like after completion.


Fried Egg

Fried egg felties takes a little more time and effort to sew but it's not that difficult actually, at least it's easier than sewing the bread slices, if you have already tried it. Haha. Here goes:

1. Draw and cut egg white and egg yolk based on the template.


2. Sew the egg yolk onto the egg white using blanket stitch. Insert poly-filling halfway through sewing and add accordingly as you close up the opening.


3. Blanket stitch another piece of white cut-out to the back of the fried egg so that the stitches are covered up. Ta-daah! Sunny side-up egg all done! :D


In Part 3, i.e. the last part of the felt sandwich set tutorial, I will share how cheese and bacon felties are made. Stay tuned!


Wednesday, 11 May 2016

Felt Sandwich Play Set: Part 1 - Bread and Tomato

This is another felt project of mine. If you find my previous "Under the Sea" quiet book instructions to be too intimidating, try this fun project! I promise it is less tedious than making a quiet book, although it still require plenty of time to complete it. Haha. :P

The project is nothing new and in fact, you can find plenty of it on the internet but I sure hope my step-by-step tutorial is one of the most complete guide you can possibly find. These are the stuffs that comes with the sandwich set: bread, tomato, lettuce, egg, cheese, and bacon. As the blog title suggests, I will cover bread and bacon first in this post. Let's get started:

Bread

Here's what you'll need, light beige colour felt for the body of the bread, light brown felt for the crust of the bread, poly-filling, matching thread, and needle. 

1. Draw and cut template.


2. Start sewing one side of the bread "body" to the crust using blanket-stitch. I know, it seems a little difficult at first since it is three dimensional, but really, it'll get better when you get the hang of it. Hehe. My strips weren't long enough so I just overlap another strip a few stitches before the first strip comes to an end. You should end up with something like this, creating a shallow pocket for the filling later.


3. Place a thin layer of filling, followed by a layer of felt, and lastly, add another layer of poly-filling. Sandwiching felt between filling layers creates a more sturdy body for the bread. 


4. Place the outer piece on top the poly-filling. Blanket stitch around the edges of the bread slice. How to get nice crisp edges? Insert a chopstick and tuck around the edges from the inside of the bread slice. Do this a few times as you close up the "bread", adding or adjusting the filling where necessary. Ta-daah, the felt bread slice is ready! Ah, don't be too happy just yet, you'll still need to at least sew another slice of "bread" for the sandwich set! Haha.


Tomato

The worst is over now that the bread slices are done. LOL. The rest of the sandwich set are definitely easier to sew. Let's continue with sewing tomato slices. You'll need felt in red and maroon colour,  hot glue, yellow thread and red thread.

1. Draw something like this and cut red colour felt based on your template.


2. Cut the maroon felt into a matching size as the inner part of the tomato. glue two piece of the cut-outs together to get something like this.


3. Sew tomato seeds randomly using yellow thread. If you do not have thick threads, just double up normal strands of thread, tie a knot at the end, and start sewing. You will need two pieces of these for every tomato slice. Oops... The back is messy but it'll be hidden later. :P


4. Lastly, blanket stitch two pieces together back-to-back.Voile! A slice of tomato is ready! Now, continue stitching as much slices as you like. Haha.


Do stay tuned for my coming post for lettuce and egg felties. Happy crafting!


Monday, 9 May 2016

Felt Sandwich Play Set: Video + Template

Good day!

This is a video of my felt sandwich play set. Free template for all the felties are available here. Stay tuned for the detailed step-by-step tutorials for you to make your own bread, egg, lettuce, tomato, cheese and bacon! :D


Friday, 15 April 2016

"Under the Sea" Quiet Book: Video + Template

Hello again! As promised, this is the video for the completed "Under the Sea" book. Click here for the printable template.


Here are all the related links for the step-by-step guide:
  1. What's a Quiet Book: Materials & Tools
  2. Surfacing Whale
  3. Sliding fish and Lift-the-Flap Oyster
  4. Sensory Jellyfish 
  5. Peek-a-Boo Crab
  6. Tic-Tac-Toe
  7. Clown Fish among Seaweeds
  8. Fish Puzzle
  9. Cover of the "Under the Sea" Quiet Book
  10. Page Finishing and Book Compilation
Last but not least, please do tag me on Facebook if you happen to make any quiet book pages of your own. I would really love to see how yours turn out. Hehe.

Thanks for reading and happy crafting! :D


Wednesday, 13 April 2016

Quiet Book: Page Finishing and Book Compilation

There are plenty of ways to finish off the pages: (1) attach bias tape, (2) use a serger or a zig zag stitch, if your sewing machine allows, or, (3) hand sew it with blanket stitch. I use the third method after a not so pleasant experience of trying to attach bias tape on the edges of thick pages using my not so heavy-duty sewing machine some time ago. The stitches would sometimes come out uneven or threads would clump together in a mess. Worst still, I need plenty of time and patience to remove the stitches, and sew it again all over. >.<

And of course, I don't have a serger nor a machine that allows me to do a zig-zag stitch. So until I get a proper machine, I'd rather stick to the good ol' method of hand sewing with a blanket stitch. The bright side of this method? It gives a nice "hand-made" look to the final book! :P

So here's what you do when all the book pages and book cover are ready:

1. Arrange pages to your preference. Blanket stitch pages back-to-back, i.e. sew page page 2 on the back of page 1, page 4 on the back of page 3, and so on.

2. I use a 2-in-1 eyelet plier like this to punch holes on all of the pages and attach eyelets. Here's what to do: punch holes, trim around the holes if necessary (the edges of the cut does not always come out clean due to the thickness of the page), push eyelet through the hole on the right side (i.e. the front of the page), align the plier and place washer on the wrong side (i.e. the back of the page), and lastly, squeeze the pliers together. The size of my quiet book is 25cm x 25cm so I punched 3 holes on each page to hold the book together better. The distance between holes is personal preference but mine is as shown in the picture below.


3. Last but not least, join all pages together with clip rings. Ta-daah! The book is now all done! :D


If you still can't get the hold of applying eyelets, fret not, I have a video coming up on how to apply it! Trust me, it's a nice tool to use for almost any craft and sewing project! Do stay tuned for a video of my completed book too! :D


Monday, 11 April 2016

Quiet Book: Cover of the "Under the Sea" Book

I'm finally back with my "Under the Sea" quiet book again after more than a month now! >.< If you have been reading my previous posts, you'll notice that I've been busy posting recipes, travelling Japan, and organising my tiny human's first birthday photoshoot. Haha.

Now that all eight pages of the book are ready, it's time to finally make the book cover! The steps are pretty straightforward this time, so here goes!

1. Use a piece of white colour felt as the base of the cover. Cut a wavy piece of blue colour felt as the sea. Cut some sea grass out of a green colour felt.


2. Print the book title in your preferred font. Cut the template, lightly trace the outline of inverse of the alphabets onto a piece of felt, and start cutting out the alphabets. Why the inverse? So that there are no traces of ball pen lines on the right side of the alphabets. :D Some pretty useful tips about alphabet cutting here: thicker fonts are easier to work with and the easiest way of cutting holes for letters like "a", "b", "e" and so on, is to use a hole punch.


3. Draw and cut template for the seahorse. Stick two pieces together using a glue gun. Sew decorative lines on the tummy of the seahorse using back-stitching. Add googly eyes to the seahorse.


4. Glue the blue wavy felt onto the white felt and start assembling the cover. Arrange all items according to your liking and make necessary adjustments before you start glueing everything permanently.


5. Get another piece of felt to act as the inside of the cover. Using blanket stitch, attach both the outside and the inside of the cover together. Ta-daah, it's now all done!


6. Similarly, sew two piece of felt together using blanket stitch as the back of the book cover.


The quiet book is almost complete now! Do look out for my next post on page finishing and book compilation. :D


Saturday, 5 March 2016

DIY No Sew Tutu Dress for Tiny Humans

This DIY tutu dress is part of my preparation for Baby V's first birthday smash cake photoshoot soon. Well, not that soon actually, it's like a month away from now but I am a kia-su mum so I'd like to be ready sooner than later. Haha. If you are interested in making your own tutu dress for your princess, read on!

You'll need a crochet headband (mine measures about 15 x 15 cm), tulle in your preferred colours, a pair of scissors and a measuring tape. You can get all these from your local fabric store or craft store. 


The length of the tulle depends on the height of your little one. I wanted my tutu to be about 25 cm long so I cut my tulle into 50 cm length. The length is doubled because the tulle will be folded into half when tied onto the crochet headband.


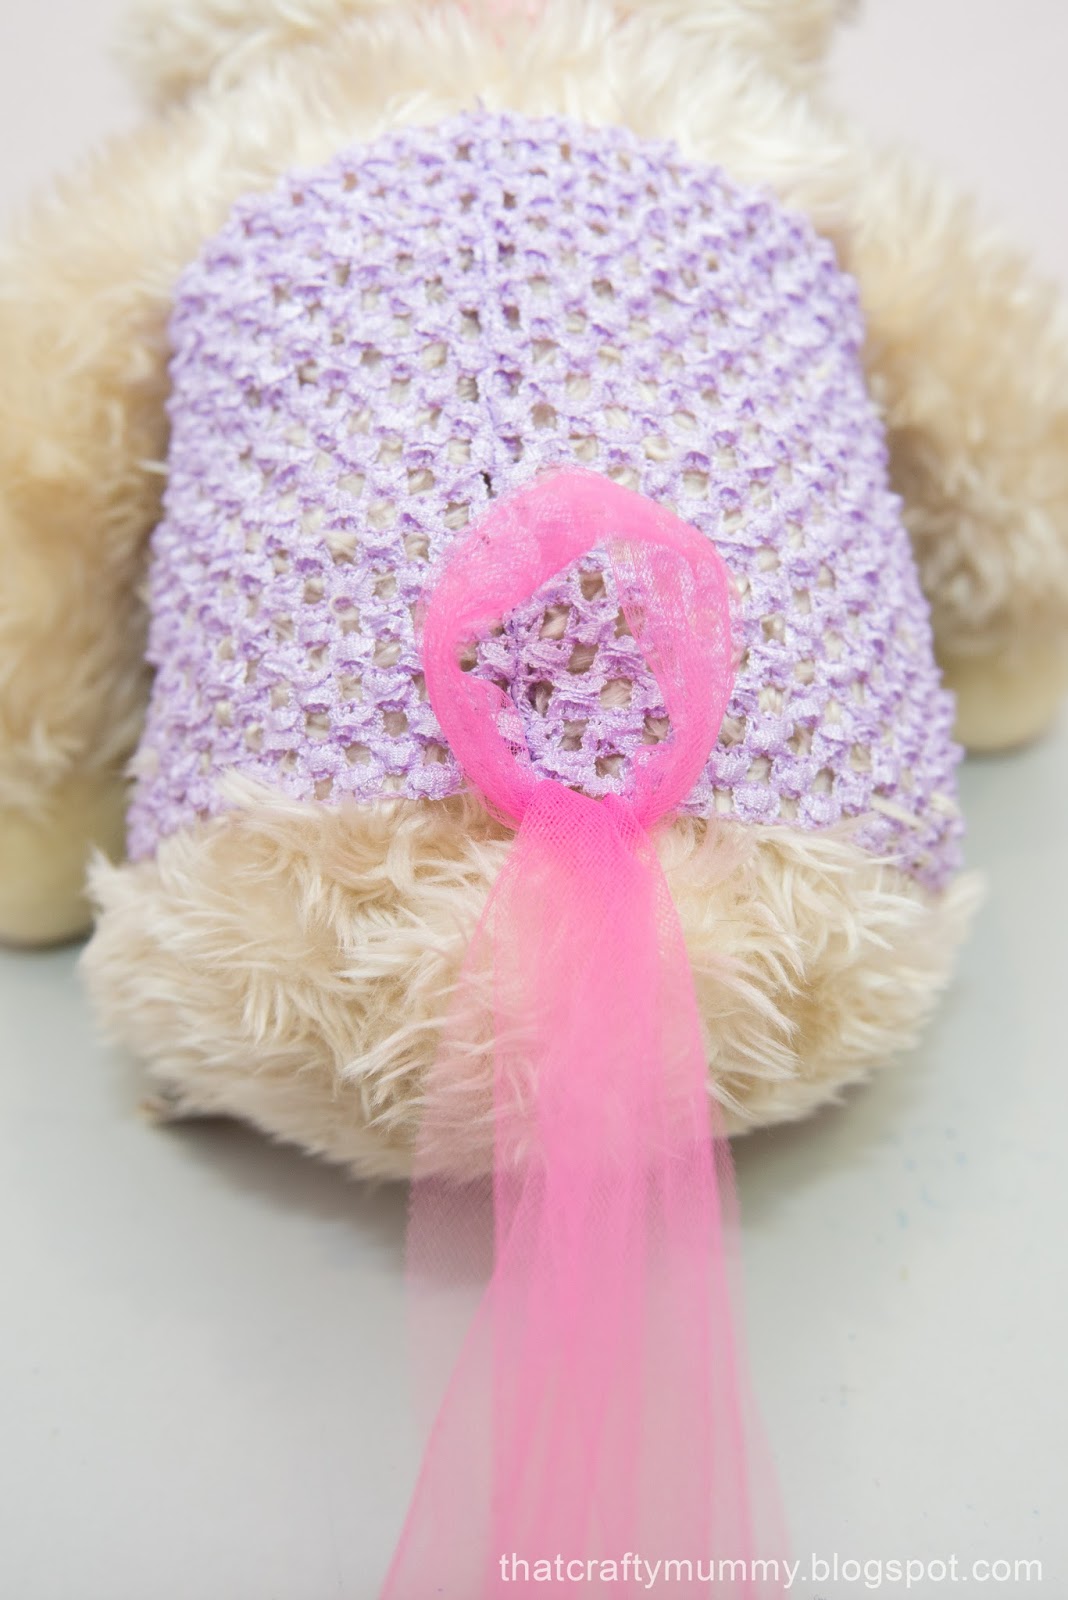
Stretch the headband onto something bigger so that the holes on the headband can be easily located. I stretched mine on a teddy bear. Haha. 


Now that the headband is stretched, locate the first hole from the seam of the headband. Fold tulle strands into half and pull it through the hole to create a loop.


Then, pull the two ends of the tulle down into the loop and tighten the knot.


Continue around the headband and you'll get something like this. My knots of tulle is tied in alternating colour of dark pink and light pink. At this point of time, the tutu dress is already good to go.


However, I wanted my tutu dress to be puffier so I added another layer of shorter tulle (42 cm strands) on top of the existing layer. This time, I tied my strands of light purple tulle in alternating holes of the next layer instead of every holes of the layer. Voile! My tutu dress in shades of purple and pink is all done!


You can go on and add extra embellishments like ribbons, rig rags, flowers, and pearl beads to make the tutu dress more adorable. It all boils down to creativity and how you want to design your tutu dress. I prefer to keep mine simple for now. Hehe

Happy trying and do share the picture of your tutu dress! :D

P.S. I can customise tutu dress for your little one too. Hehe. Do contact me for details at thatcraftymummy.gmail.com